![]()
Description
In cooperation with Phonexia Voice Verify and Nuance Gatekeeper, AudioCodes offers voice biometric/verification services for identifying callers. With a series of interconnected flows it is also possible to integrate this process directly into a Cognigy voice project.
Overview
Before we go into how the process is setup we will need to discuss how Cognigy interacts with the AudioCodes voice gateway and the verification service provider.
In general when starting the verification process, Cognigy sends a notice to AudioCodes and the voice verification service telling it to start a certain part of the process. AudioCodes will then begin this process and send a response back in the input.data object of the conversation.
This means the project must be built in such a way to react to these responses as if they were user inputs.

Setup
This article assumes you have have agreements with both AudioCodes and either Phonexia or Nuance and that the voice verification server has already been integrated into your AudioCodes VoiceAI Connect instance. If not please contact AudioCodes before integrating this process.
The simplest way to trigger the following processes is via the AudioCodes Voice Verification Extension. The following process is based on that extension so please download and install it before continuing.
Speaker ID
Each node in the extension only has one field and this should be consistent throughout the process. This field is used to define the AudioCodes speaker ID. This ID is unique to the user who is being verified and is required for every setup in the process and ideally should be a number which is also consistent throughout different conversations. In this example the voice ID is being set as the caller's number, because we know this is unique to the user and that is will remain consistent with every conversation. This could also be something like an employee number or a customer number.
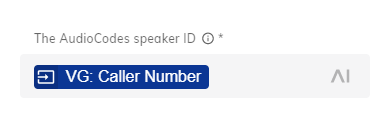
This information will need to be entered separately for each individual node.
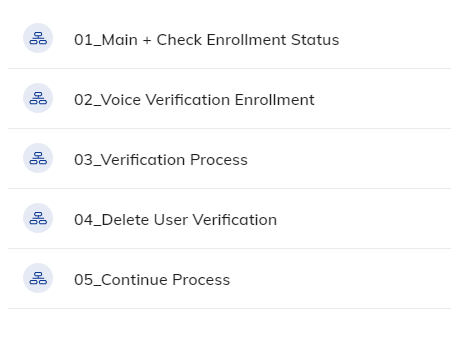
Agent Structure
It is suggested that each part of this process be set up with it's own sub flow which can be accessed via a Go To Node:
The reason for using Go To Nodes instead of execute flow nodes is because we are expecting a response from AudioCodes via an input object. This means the AudioCodes response will be interpreted as a user response and by building flows in this way we can created process which dynamically respond to these inputs.

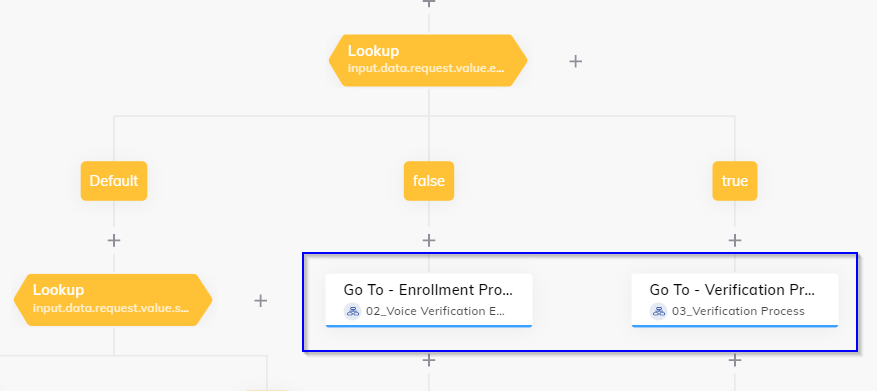
Check enrollment status

This node sends information to AudioCodes telling it to check if the user number given has already been registered to the server. We will then receive a response in the input data field:
input.data.request.value.enrolled
This will either be "true", if the user has been enrolled, or "false" if the user has not.
If true you can continue with verification. If the value is false you can begin the enrollment process for voice verification.
Start enrollment

If the user is not yet enrolled in the system you might choose to start the enrollment process.
This can be complicated from a design perspective because in order to complete the process AudioCodes requires at least 15 seconds of audio. If there is not enough audio we will receive a response in the following input data field:
input.data.request.value.moreAudioRequired
This means the user will need to be reprompted to add more audio. The extension will not need to be used again because this message also means that AudioCodes is still listening.
And in the following field you will also receive a response in clear text telling you how much audio is still required:
input.request.value.rawResult.body.detail
This will contain a string with detailed information, for example: "Stream contains 7s of minimum 15s of speech."
This however is cumulative. This means even if you receive this message the user does not need to record 15 seconds of speech but rather only the remaining 8 seconds. You can split the audio collection up into parts, for example by asking the user multiple questions which require longer answers, until you reach the minimum required audio.
If the enrollment has been successful you will receive a response in the following input data field:
input.data.request.value.success
This will either be "true" if it was successful or "false" if not.
In the case of true you can either begin the verification process anew or move on with the process.
If you receive false as a response something else has gone wrong and you should contact AudioCodes or the verification provider for help.
Start verification process

If the user has already been enrolled the actual verification process can begin.
This works similar to the enrollment process, however AudioCodes not only requires 3 seconds of speech. We suggest you give the user an example sentence to repeat back to the bot, such as "the quick brown fox jumped over the lazy dog".
If the user has not given enough audio you will receive a response with the value "true" in the following field:
input.data.request.value.moreAudioRequired
In this case just as with the enrollment process you will simply need to reprompt the user for more audio, such as asking them to repeat the sentence from before.
After collection enough audio you will see if it has been successful in the following field:
input.data.request.value.success
In the case of "true" the verification process was completed successfully. This however, does not mean the user was verified. This can be found as a string in the data input under:
input.data.request.value.verified
If the response is "yes" the user has been verified and the process can continue. If the value is "no" the user could not be verified and the process should be stopped. If the value is "unknown" another factor has caused the verification to fail and the user should be prompted to try at another time.
Delete voice verification information

In some cases it might be necessary to delete the user's voice biometric information from the system. This can be done with the "Delete voice verification profile" node.
This node only requires the user's ID in order to delete the profile, so it is suggested you design the agent to verify the user before going through this process.
A response will arrive in the following input data object:
input.data.request.value.success
If it is "true" the biometric data has been deleted. If it is "false" something has gone wrong and the user will need to try again later.
Video Demonstration
Here is a video demonstrating the process.
Comments
0 comments