Amazon Connect is a cloud contact center that can be up and running in minutes, on both telephone and chat channels. It has a pay-as-you-go pricing model that many businesses are starting to find attractive.
With Amazon Connect being so easy to access, all of a sudden, the power of Conversational AI can be readily employed in contact centers of all shapes and sizes.
Table of Contents
- Architecture
- Cognigy.AI: Set up the Virtual Agent
- AWS: Create the Lambda Function
- AWS: Create a Lex Instance
- Amazon Connect - Admin: Configure Contact Flows
- Amazon Connect: Create the Contact Flow
- Amazon Connect: Assign the Contact Flow to a phone number
- (Optional) Download the Amazon Connect Extension
- Test the connection
Architecture
The following graph shows the high-level architecture:
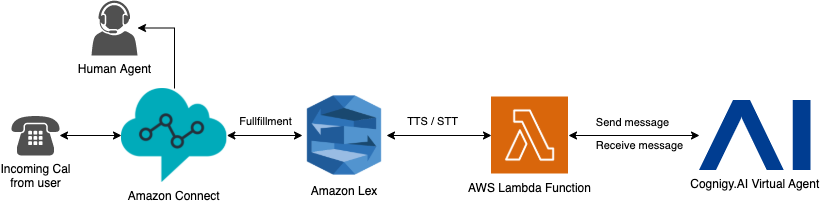
From left to right, the user calls a number (DID) accociated with the Amazon Connect instance, first. This called phone number uses a specifc Contact Flow to handle the response. It uses an AWS Lambda Function to fullfill the request. In order to process the message properly, Amazon Lex transforms the incoming speech to text (TTS). Afterward, the Lambda Function calls an Endpoint inside of Cognigy.AI where the virtual agent recognizes the intent and returns a fitting response based on the conversational Flow. This response gets sent back to Amazon Lex and transformed from text to speech (STT) where a configured Ouput Voice reads out loud the text to the calling user. This process gets repeated as long as the call wasn't hung up or forwarded to a human agent.
Natural Language Understanding (NLU)
In this setup, Amazon Lex is only used for handling Text-To-Speech (TTS) and Speech-To-Text (STT) so that the entire understanding and recognization of intents is handled within the Cognigy.AI Virtual Agent. With this configuration in place, the Conversation Designer doesn't have to maintain resources twice and can benefit from the centralized orchestration offered by Cognigy.AI.
Cognigy.AI: Set up the Virtual Agent
The first and easiest thing to do, is to set up the virtual agent for this connection. In this case, a REST Endpoint is used for sending and receiving messages. Please follow these steps:
- Login to Cognigy.AI and navigate to the virtual agent
- In the left side menu, navigate to Deploy -> Endpoints
- Click on + New Endpoint
- Call the Endpoint "Amazon Connect" or something similar
- Select a Flow that should handle the incoming message
- Select REST as Endpoint type
- Click SAVE
Now, one gets forwarded to the details page of the newly created Endpoint. The Endpoint URL will be used later in the AWS Lambda Function:

Nothing more is required inside of Cognigy.AI.
AWS: Create the Lambda Function
The next step is to create the Lambda Function inside of Amazon Web Services (AWS) that fullfills the incoming and outgoing requests. In order to set up the general function, please follow the official documentation provided by Amazon: https://docs.aws.amazon.com/lambda/latest/dg/getting-started-create-function.html
As soon as the Function is created, the following code can be inserted into the the intended field:
const COGNIGY_ENDPOINT_HOSTNAME = "endpoint-trial.cognigy.ai";The only required configuration to take is to insert the COGNIGY_ENDPOINT_HOSTNAME and COGNIGY_ENDPOINT_PATH. Both values can be extracted from the previously created Cognigy.AI Endpoint URL:
const COGNIGY_ENDPOINT_PATH = "/your-url-token";
exports.handler = async (event, context, callback) => {
try {
// Call was initialized by Amazon Lex
if (event.hasOwnProperty("Details")) {
let postObject = {
userId: event['Details']['ContactData']['CustomerEndpoint']['Address'],
sessionId: event['Details']['ContactData']['ContactId'],
text: event['Details']['Parameters']['text'],
data: {}
}
var resultMap = await sendMessageToCognigy(postObject);
resultMap['data']['connect_action'] = 'NONE'
var resultMapObj = { text: resultMap['text'], action: resultMap['data']['connect_action'] }
callback(null, resultMapObj);
} else {
//From Connect via Lex
let postObject = {
userId: event['sessionAttributes']['CustomerNumber'],
sessionId: event['sessionAttributes']['ContactId'],
text: event['inputTranscript'],
data: {}
}
var defaultSessionAtrributes = {
"action": "NONE",
"action_data": ""
}
var resultMap = await sendMessageToCognigy(postObject);
if (resultMap['data'] && resultMap['data']['connect_action']) {
defaultSessionAtrributes['action'] = resultMap['data']['connect_action']
}
if (resultMap['data'] && resultMap['data']['connect_action_data']) {
defaultSessionAtrributes['action_data'] = resultMap['data']['connect_action_data']
}
var resultMapObj = {
sessionAttributes: {
action: defaultSessionAtrributes.action,
action_data: defaultSessionAtrributes.action_data
},
dialogAction: {
type: "Close",
fulfillmentState: "Fulfilled",
message: {
contentType: "PlainText",
content: resultMap['text']
}
}
}
callback(null, resultMapObj);
}
} catch (e) {
return e;
}
}
const https = require('https');
async function sendMessageToCognigy(postObject) {
return new Promise((resolve, reject) => {
const postData = JSON.stringify(postObject);
const options = {
hostname: COGNIGY_ENDPOINT_HOSTNAME,
path: COGNIGY_ENDPOINT_PATH,
method: 'POST',
headers: {
'Content-Type': 'application/json'
}
};
const request = https.request(options, handleResponse);
request.on('error', (error) => {
reject(error);
});
request.write(postData);
request.end();
function handleResponse(response) {
let data = '';
response.on('data', (d) => {
data += d.toString();
});
response.on('end', () => {
// Resolve with javascript object of JSON response:
resolve(JSON.parse(data));
});
}
});
}

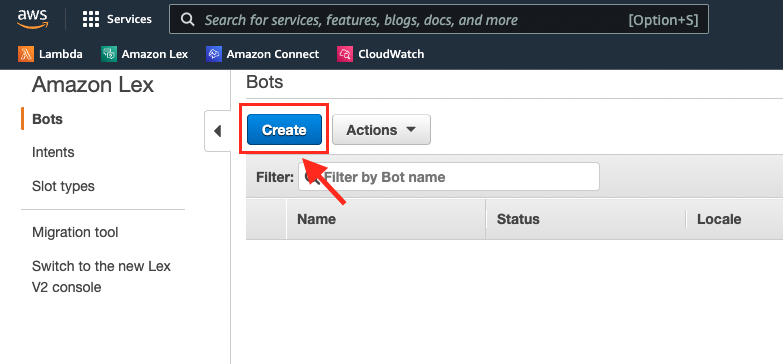
AWS: Create a Lex Instance
Next, the Amazon Lex instance must be created and configured to handle STT and TTS. Please read the official documentation for general information about Lex: https://docs.aws.amazon.com/lex/latest/dg/gs-account.html
Important
This Help Center article uses Amazon Lex Version 1.
Create a custom bot
Please follow these steps in order to create a function Lex instance for this connection:
- Inside of AWS, navigate to "Amazon Lex" and select the V1 Console
- In the left side menu, select Bots and click on Create
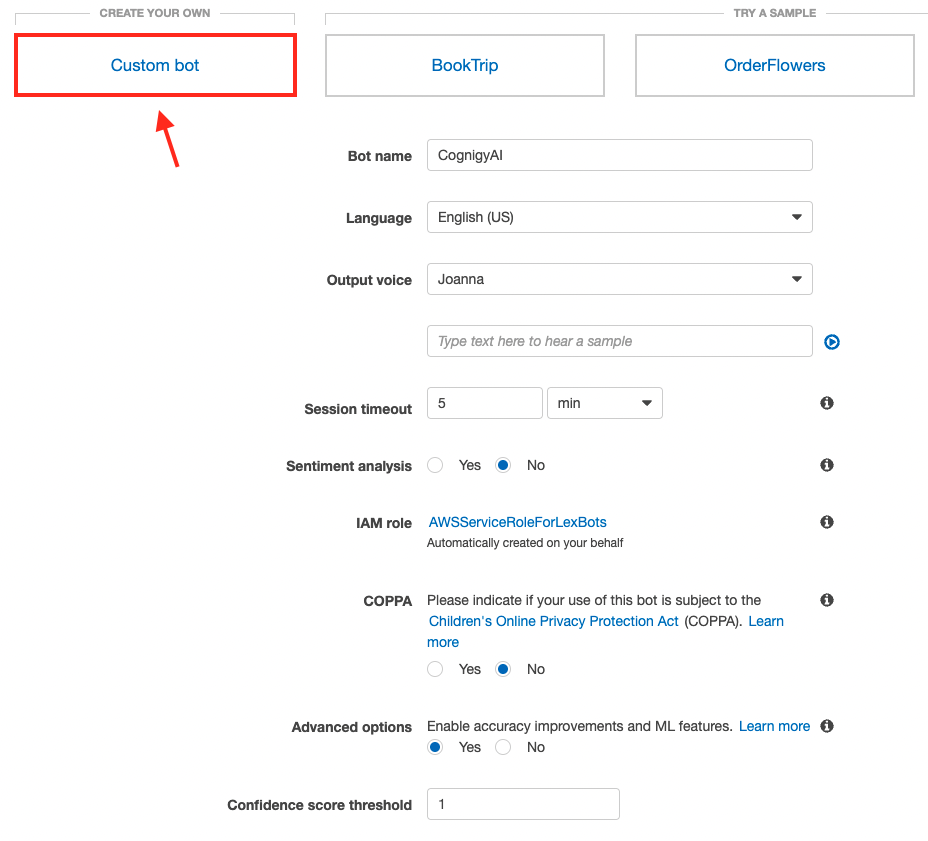
- Select Custom bot as type and fill in the required fields such as shown in the figure below:
- Click on Create
Create fallback and initiation intent
There are two intents needed to configure the Lex bot well. The first one is the built-in fallback intent that is triggered if Lex didn't understand the user's input. In this case, the previously created Lambda Function should be executed to let Cognigy.AI handle the undertanding (NLU). The second intent is a required dummy intent to be able to build and publish the Lex bot.
Please follow the below steps inside of Amazon Lex:
- Click on Create
- Click on Search existing intents
- Search for "AMAZON.FallbackIntent"
- Select it and call it "AmazonLexFallbackIntent" or something similar
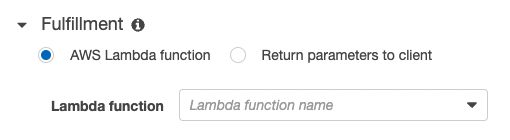
- Inside of the Intent Details view, the Fullfillment must be defined. Please select the previously created AWS Lambda Function and its alias:
- Scoll down and click Save Intent
- Navigate back to the list of Intents and click on the + to create another one. It's required to create another intent containg sample utterances.
- Inside of the opened Pop-Up, cick on Create intent
- Call it "Initiation" or something similar
- In the Details view, add a sample utterance that a user probably won't say. Something like "GET_STARTED":

- Scroll down and click on Save Intent
- The last thing to do is to Build and Publish the Lex bot in order to make it visible in Amazon Connect later. Therefore, please click Build and then Publish on the top right of the screen:

Amazon Connect - Admin: Configure Contact Flows
Before the actual Contact Center can be configured using the Access URL, the Admin page of the Amazon Connect instance must be opened to configure which Lex Bot and Lambda Function should be available in the Contact Flow later.
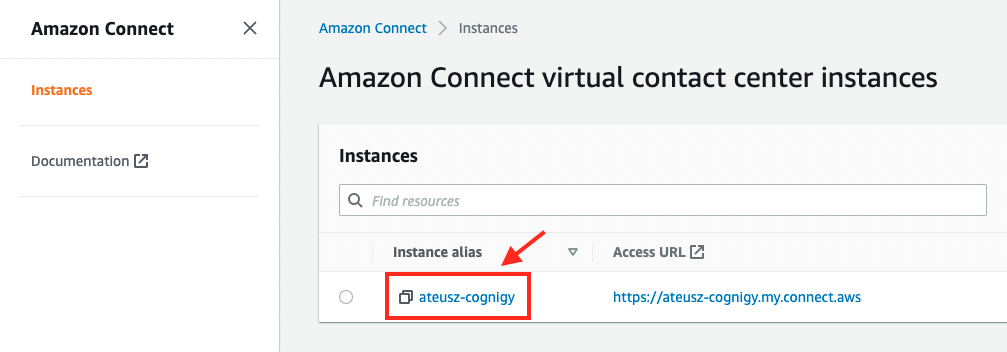
- In AWS, search for "Amazon Connect" and select it
- Click on the Instance alias to enter the admin view:
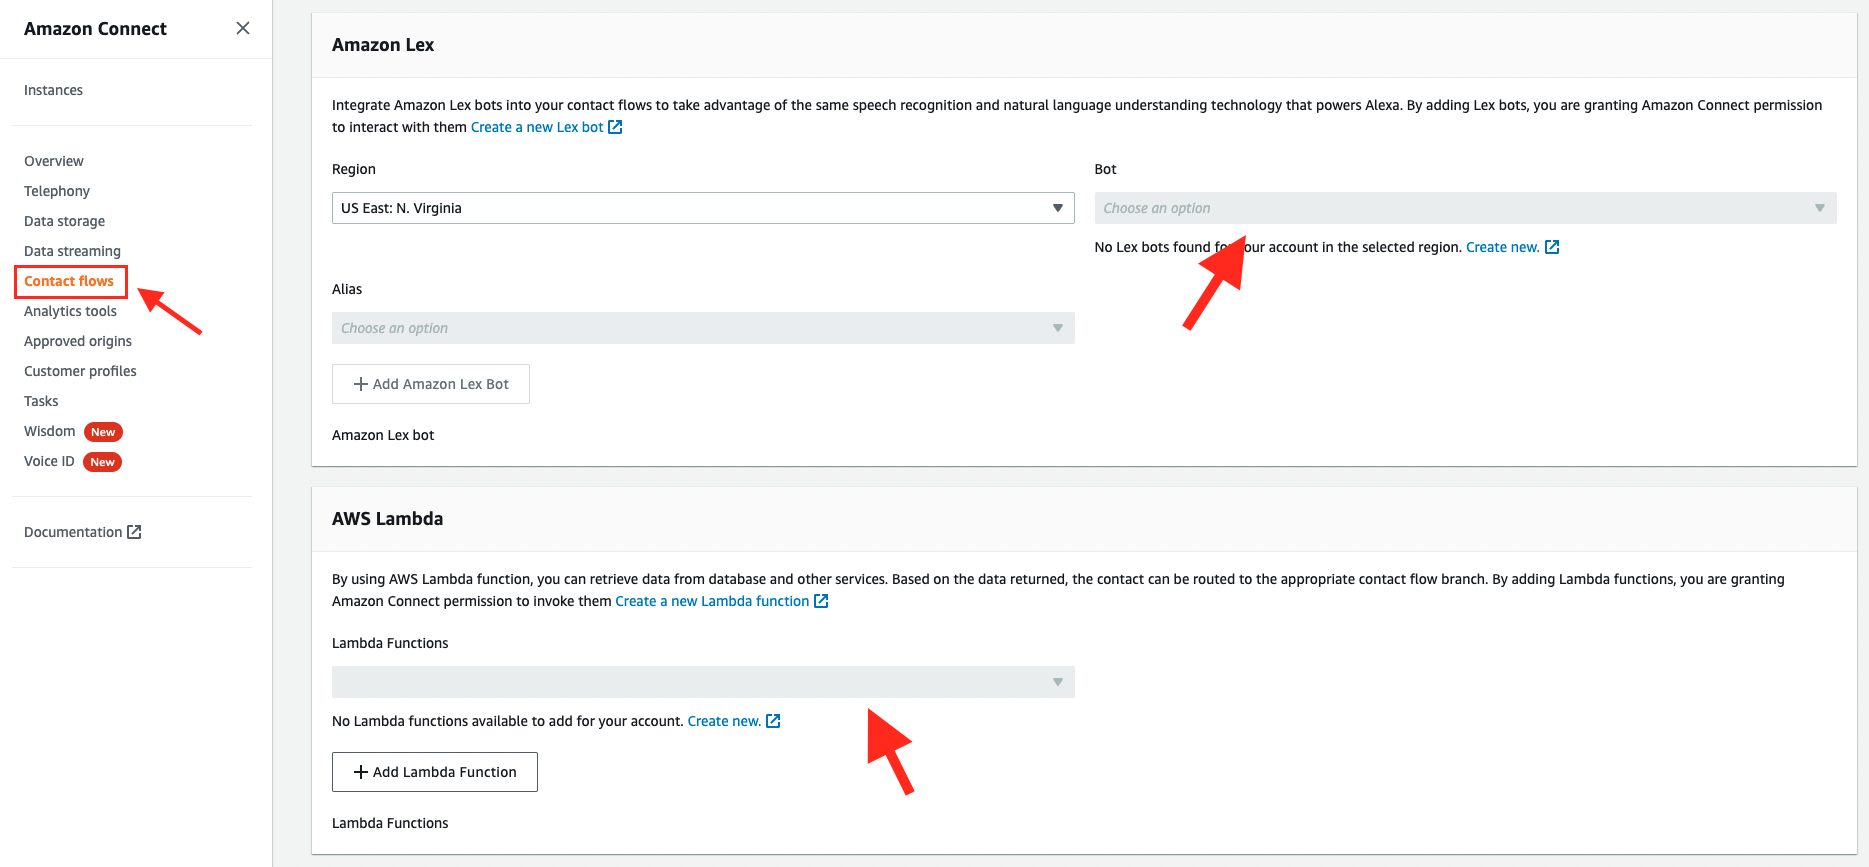
- Then, in the left side menu, click on Contact flows and select the previously created Lex bot and Lambda Function:
- Done
Amazon Connect: Create the Contact Flow
The last AWS recource that must be configured is Amazon Connect; the actual Contact Center that should be automated.
If there is no Amazon Connect instance given already, please follow the official documentation to create a new one: https://docs.aws.amazon.com/connect/latest/adminguide/amazon-connect-instances.html
Otherwise, please follow the below steps in the existing Amazon Connect instance:
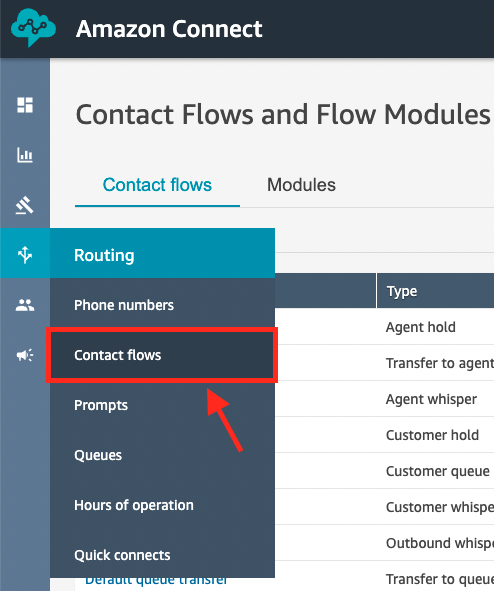
- In the left side menu, please navigate to Contact Flows:
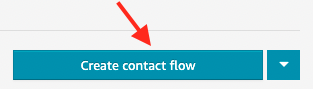
- On the top right of the screen, please click on Create contact flow:
- Now, please take a look at the top right of the screen again and click on the "Arrow Down" button
- Select Import flow
- Please upload the file called "Cognigy" that is attached to this Help Center Article. Afterward, one should see something similar to:
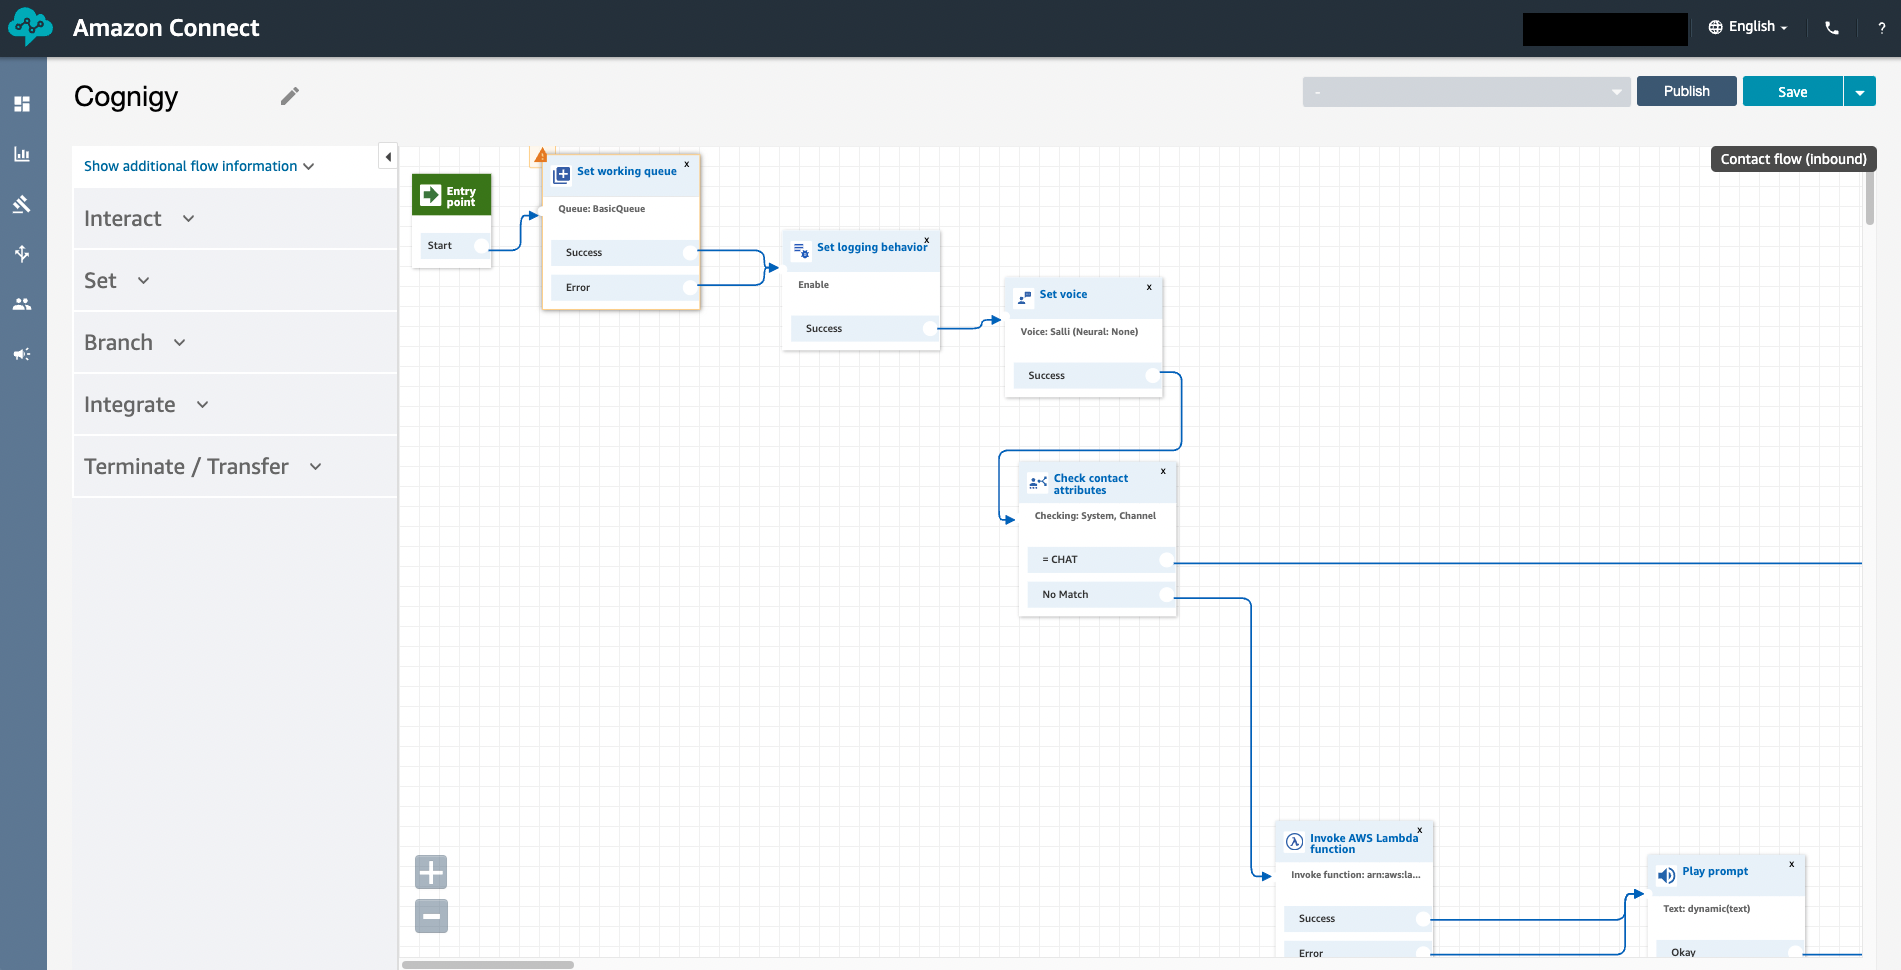
- Click on Save
Since the uploaded Contact Flow is an example, there are two nodes in it that must be updated:
- Search for the Invoke AWS Lambda Function node
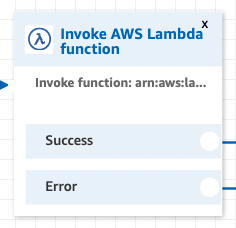
- Click on it to edit the configuration and select the previously created Lambda Function:

- Click Save
- Now, search for the Get customer input node
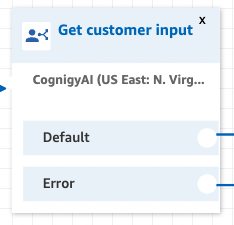
- Click on it to edit the configuration and configure it such as shown on the screenshots below:
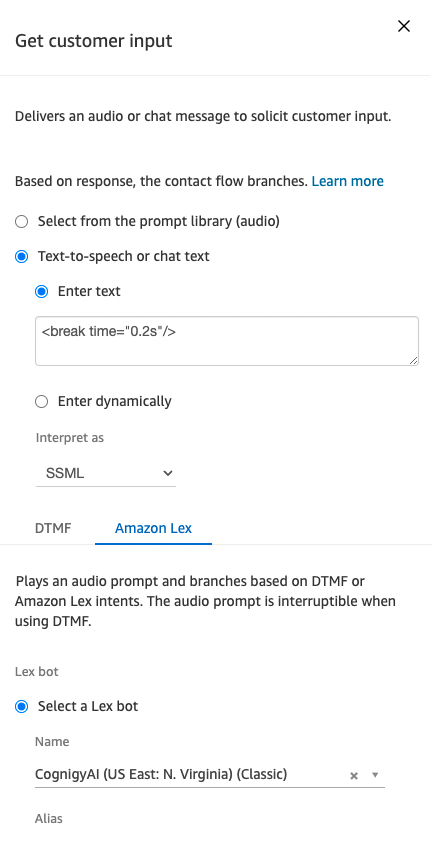

- Click Save
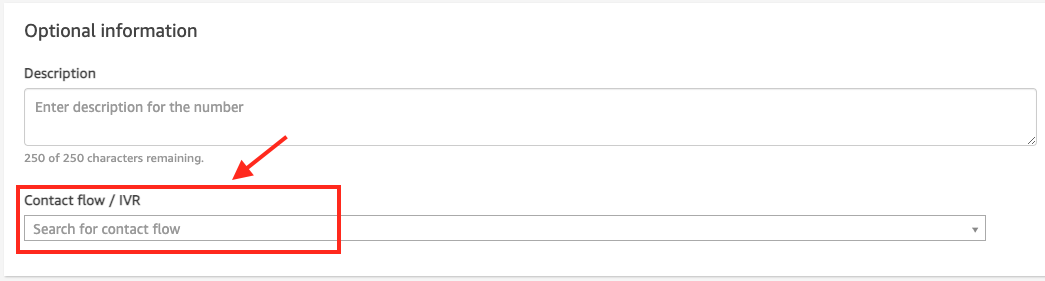
Amazon Connect: Assign the Contact Flow to a phone number
In order to use the new Contact Flow, it must be accociated with an existing phone number in the Conect instance. Accordingly, the next step is to navigate to the Phone Numbers overview: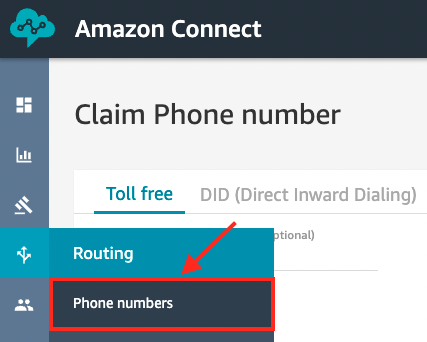
Whether claim a new phone number or select an existing one. Afterward, please search for the Contact Flow/IVR configuration and select the new Contact Flow:
(Optional) Download the Amazon Connect Extension
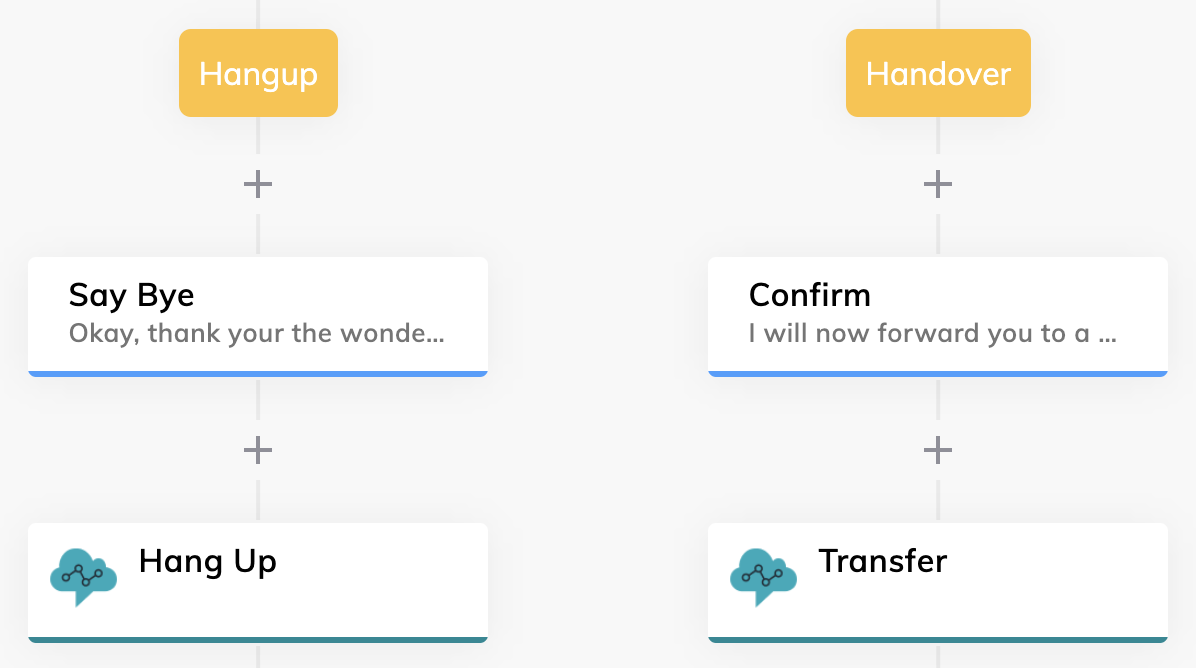
In order to hang up or transfer the call from a user in Amazon Connect, an Extension can be used that sens specific metadata that is handled by the Contact Flow that will be used in this tutorial. In this case, a Flow could look as the following:
In order to add it to the virtual agent and the corresponding Flow Chart, please download this Extension in the Extension Marketplace oder click here to download the file. If the file was downloaded, one has to upload the Extension in the Manage -> Extensions view of the Cognigy.AI virtual agent.
Test the connection
The configuration is ready to be tested. In order to do so, please call the phone number that was configured in the step before. As soon as the call starts, the first message from the Cognigy.AI Flow will be read out loud.
Congratulations!
Comments
0 comments