All articles on Intercom
Within our Cognigy.AI platform you're able to connect your Cognigy Resources to your Intercom platform by using our Intercom Endpoint integration. This allows you to create a bot with Cognigy.AI that can answer support requests from Intercom when your agents are not online or even replace them.
By creating an Intercom Endpoint in Cognigy.AI, you can utilize the power of chatbots to respond to customers outside of your agents' working hours.
This tutorial covers the necessary steps for creating and connecting an Intercom Endpoint. If you want to get information about assigning a Flow to the Endpoint and setting up the Data Management see Endpoints.
Requires an Intercom Subscription
This guide assumes that you are already have an active Intercom subscription.
Requires a free Intercom user
You need to have an Intercom user that you can use for the bot. The bot will use this user for its replies.
Two Step Preparation Process
1 Create an Intercom Endpoint in Cognigy.AI.
2 Integrate the Intercom Endpoint with your Intercom Platform
1 Create an Intercom Endpoint
Location: Cognigy.AI
The first thing you need to do is to create an Intercom Endpoint in Cognigy.AI. In order to do this, navi
gate to your Project, click on the button in the lower left corner and create an Endpoint.
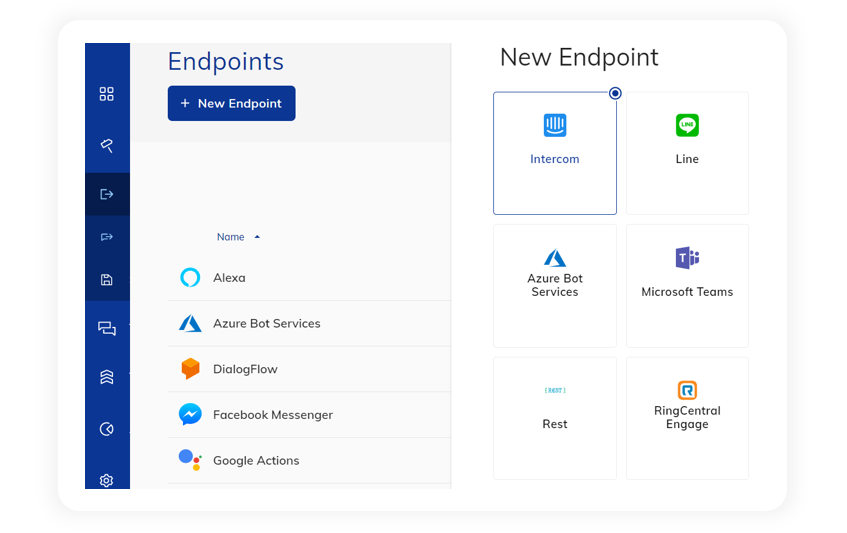
Figure 1: Creating an Intercom Endpoint
After creating your Endpoint, you should be navigated to the Endpoint configuration of your Intercom Endpoint. Here you need to set the Flow that the Endpoint should point to, and you can change the NLU Connector of the Endpoint.
 Figure 2: Obtaining the Endpoint URL from the Intercom Endpoint
Now that you have created the Intercom Endpoint, all that is left to do is to connect it to Intercom. The Intercom Endpoint contains Intercom Settings which are three settings we need in order to connect to your Intercom Platform. The settings are:
- An Access Token
- The admin ID of your bot
- The Hub Secret for your Webhook
The next chapter will describe where you can find these settings in your Intercom Platform.
2 Integrate the Intercom Endpoint with your Intercom Platform
Location: Intercom Platform
Requirements
✔ Endpoint URL
2.1 Creating an App in the Developer Hub
In order to connect your Intercom Endpoint to your Intercom Platform you first have to create an app with a webhook in the Intercom Developer Hub so that all messages sent to your Intercom is also sent to your Cognigy.AI Flow. Do this by opening Settings > Developers in your Intercom Platform and clicking the Developer Hub link.
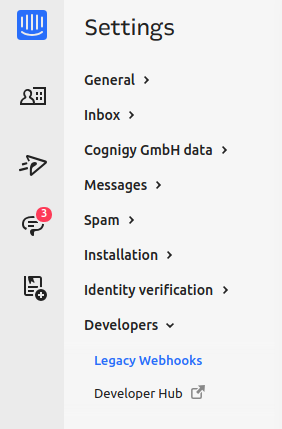
Figure 3: Link to the Developer Hub

Figure 4: Navigating to the Developer Hub
You are now ready to create an app. Click on the New app button and fill in the necessary information into the form:

Figure 5: Create Intercom App Form
2.2 Creating the webhook
In the created app, you need to navigate to the webhook page. To create the webhook, you first need to copy the EndpointURL of your Intercom Endpoint which will be used as the request endpoint URL. You can find the EndpointURL in your Intercom Endpoint in the Cognigy.AI User Interface.
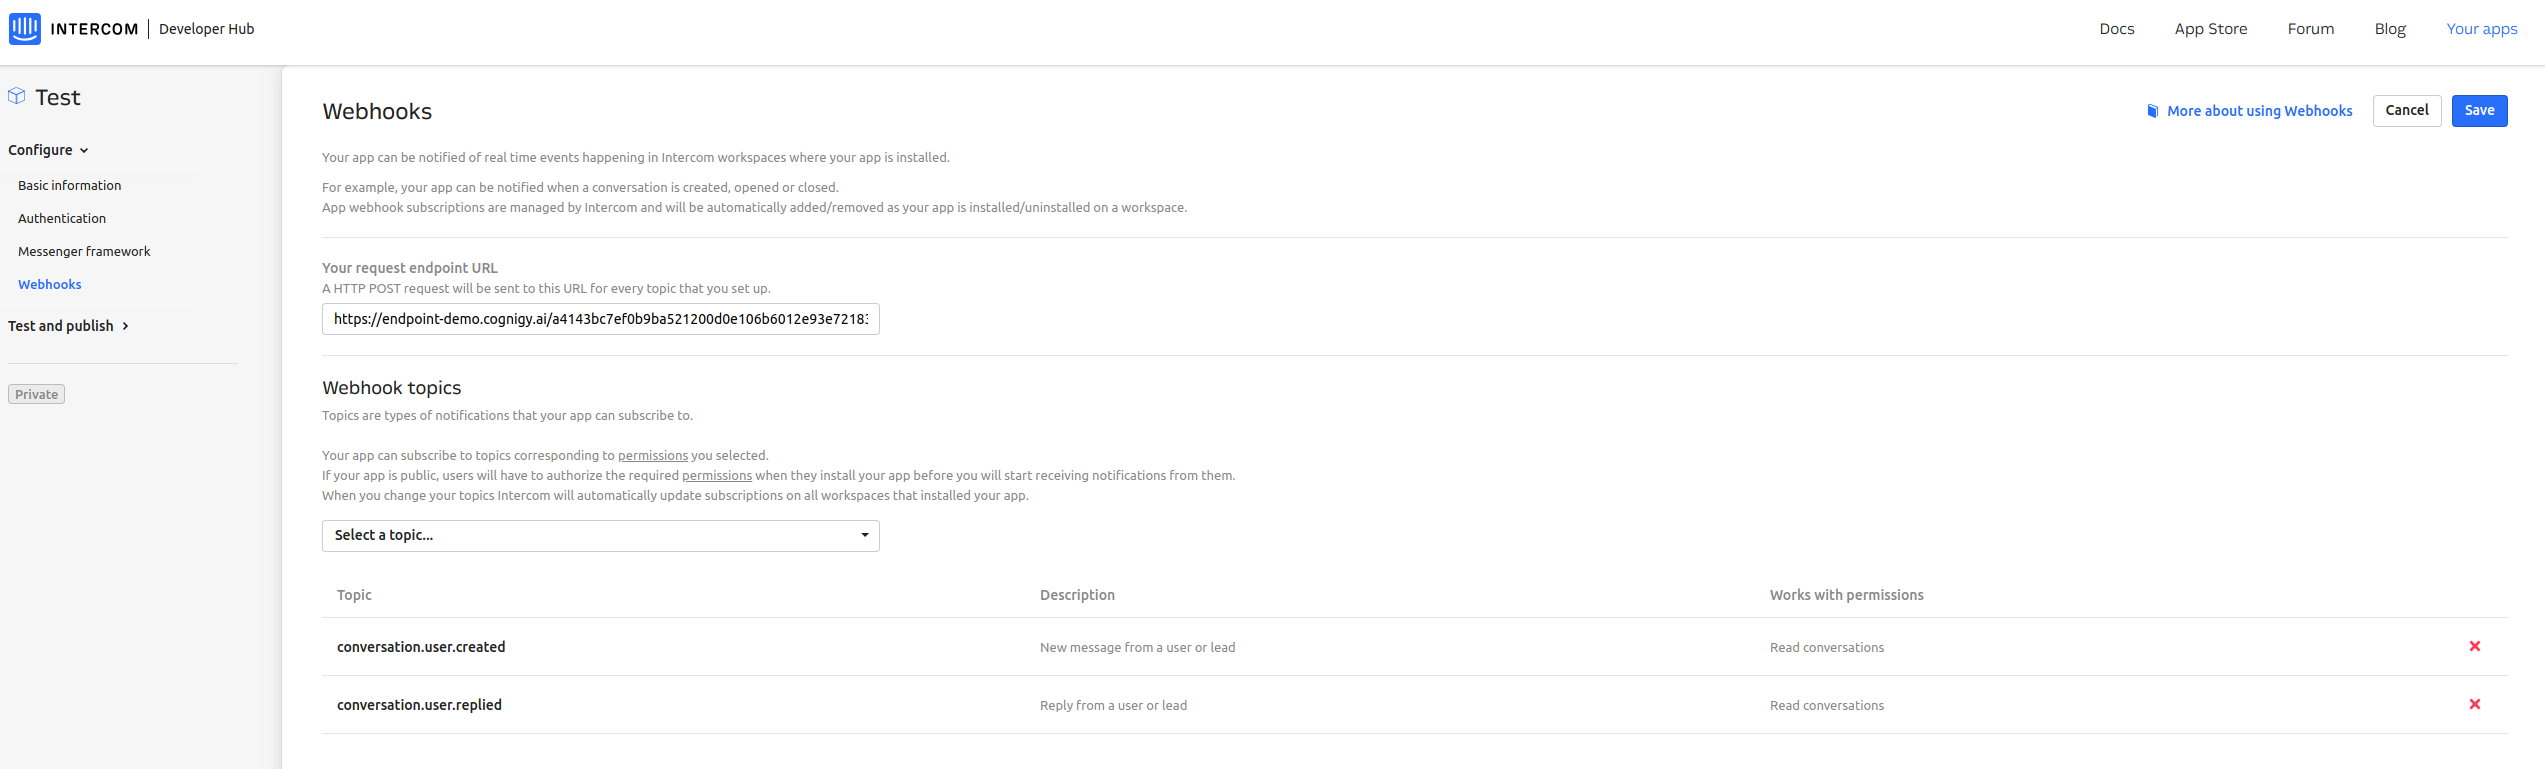
Figure 6: Create webhook
You then need to select the topics you want to subscribe to. Here you have to select the conversation.user.created and the conversation.user.replied topics. Remember to click on the Save button in the top right corner
2.3 Getting the access token
You now have to navigate to the Authentication page. Here you can optionally edit the page to disable some permissions that the Intercom Endpoint don't need - the only permission the Endpoint needs is the "Write Conversations" and "Read Conversations" permissions. After changing permissions, you need to copy the Access Token at the top of the page to save it in your Intercom Endpoint in the Cognigy.AI User Interface (see final step).
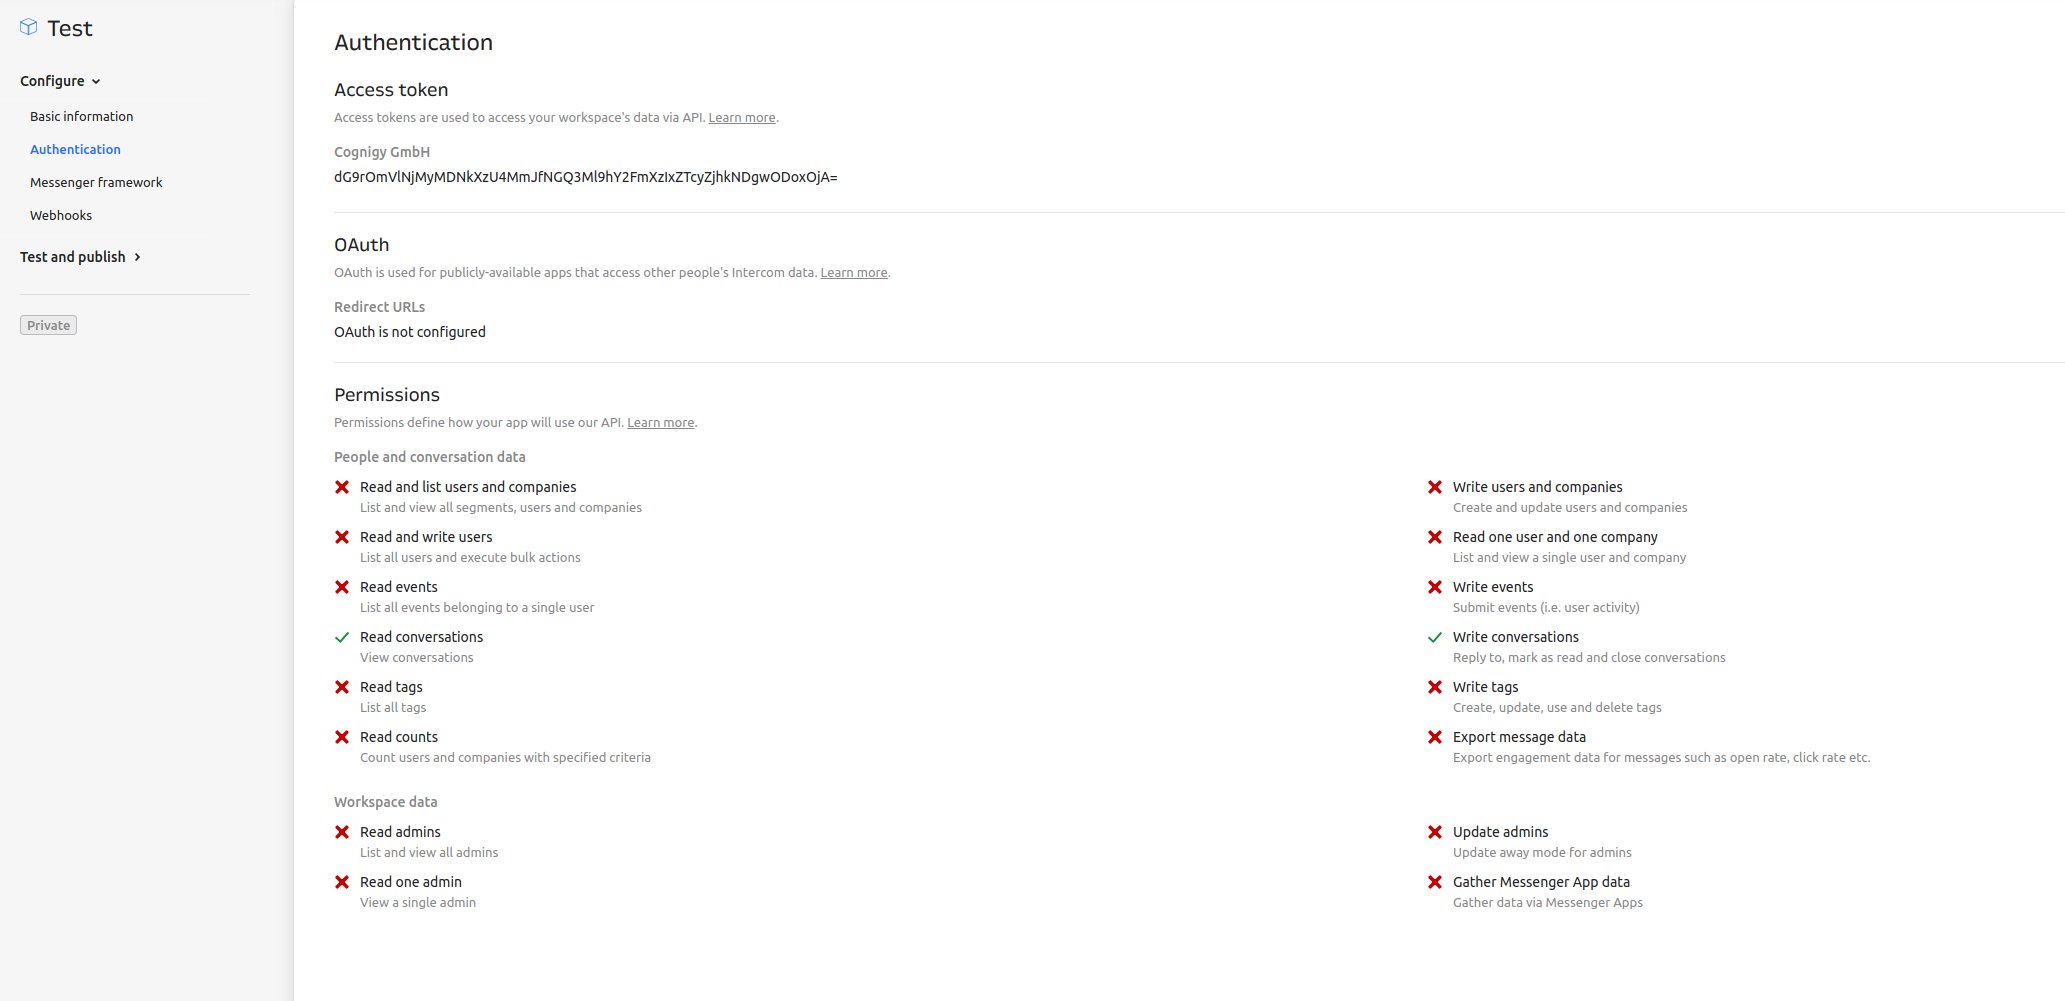
Figure 7: Getting the Access Token
2.4 Getting the Hub Secret
You can now get the Hub Secret (also called Client Secret) from your Intercom App. To find this, navigate to the Basic information page in the Intercom App and copy the Client Secret. You have to insert in your Intercom Endpoint in Cognigy.AI (see final step).
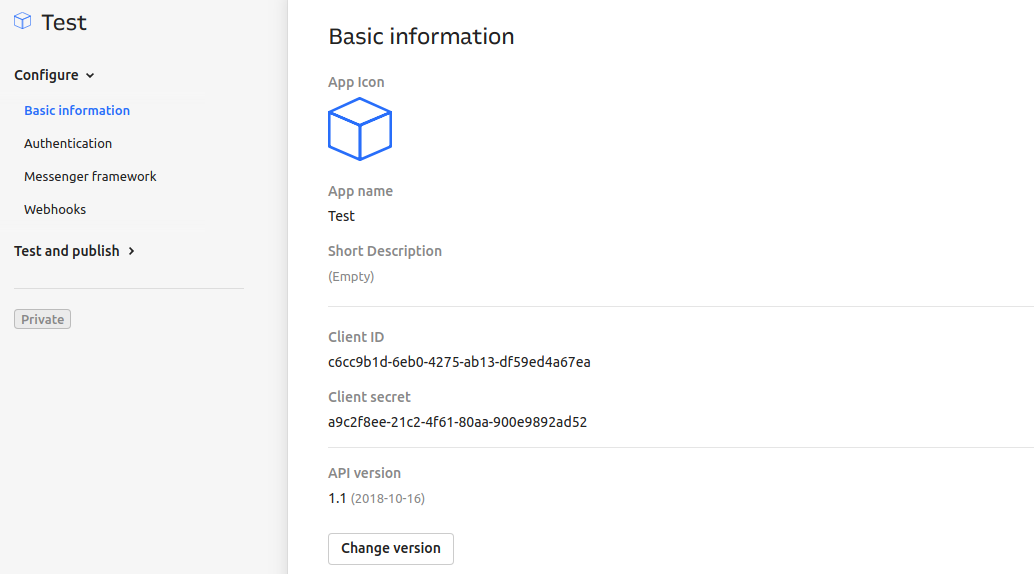
Figure 9: Getting the Client Secret
2.5 Getting the Bot User ID
The Cognigy.AI bot needs its own Intercom user in order to be able to respond to messages. This user will be the user that your customers interact with in the Intercom Webclient. You therefore need to either use an existing user on your Intercom team or create a new user. After creating the user, navigate to the user's profile in Intercom and copy the admin ID. The admin ID is the 7-digit number in the page URL of the profile, e.g. 2672346 in the URL https://app.intercom.io/a/apps/<redacted>/admins/2672346.
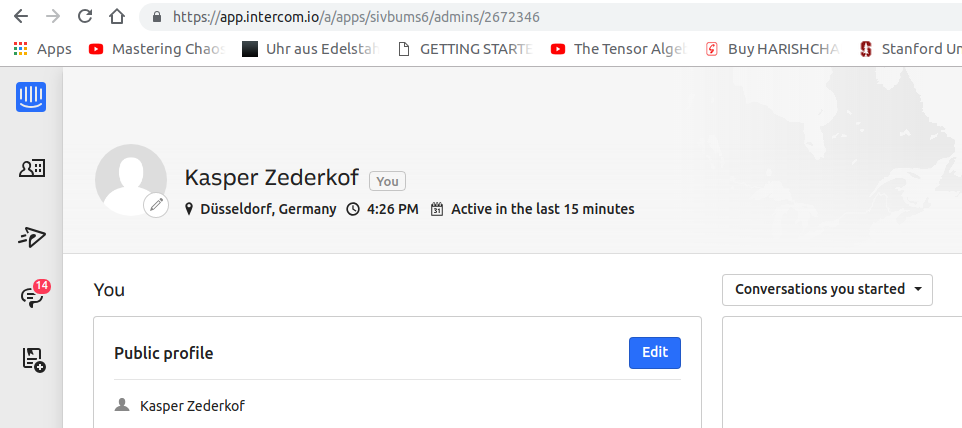
Getting the admin ID of the bot
After retrieving the admin ID, you need to paste it into the Bot User ID setting in the Intercom Settings of your Intercom Endpoint (see final step below).
2.6 Complete the Intercom Endpoint Settings
🔗 In Cognigy.AI
Navigate back to the Intercom Endpoint you created earlier in Cognigy.AI and open the Intercom Settings dropdown menu. Here you need to enter all of the credentials gathered in the previous steps including the Access Token, Bot User ID and the Hub Secret. You can also set a message delay to make a small pause before bot messages are sent.
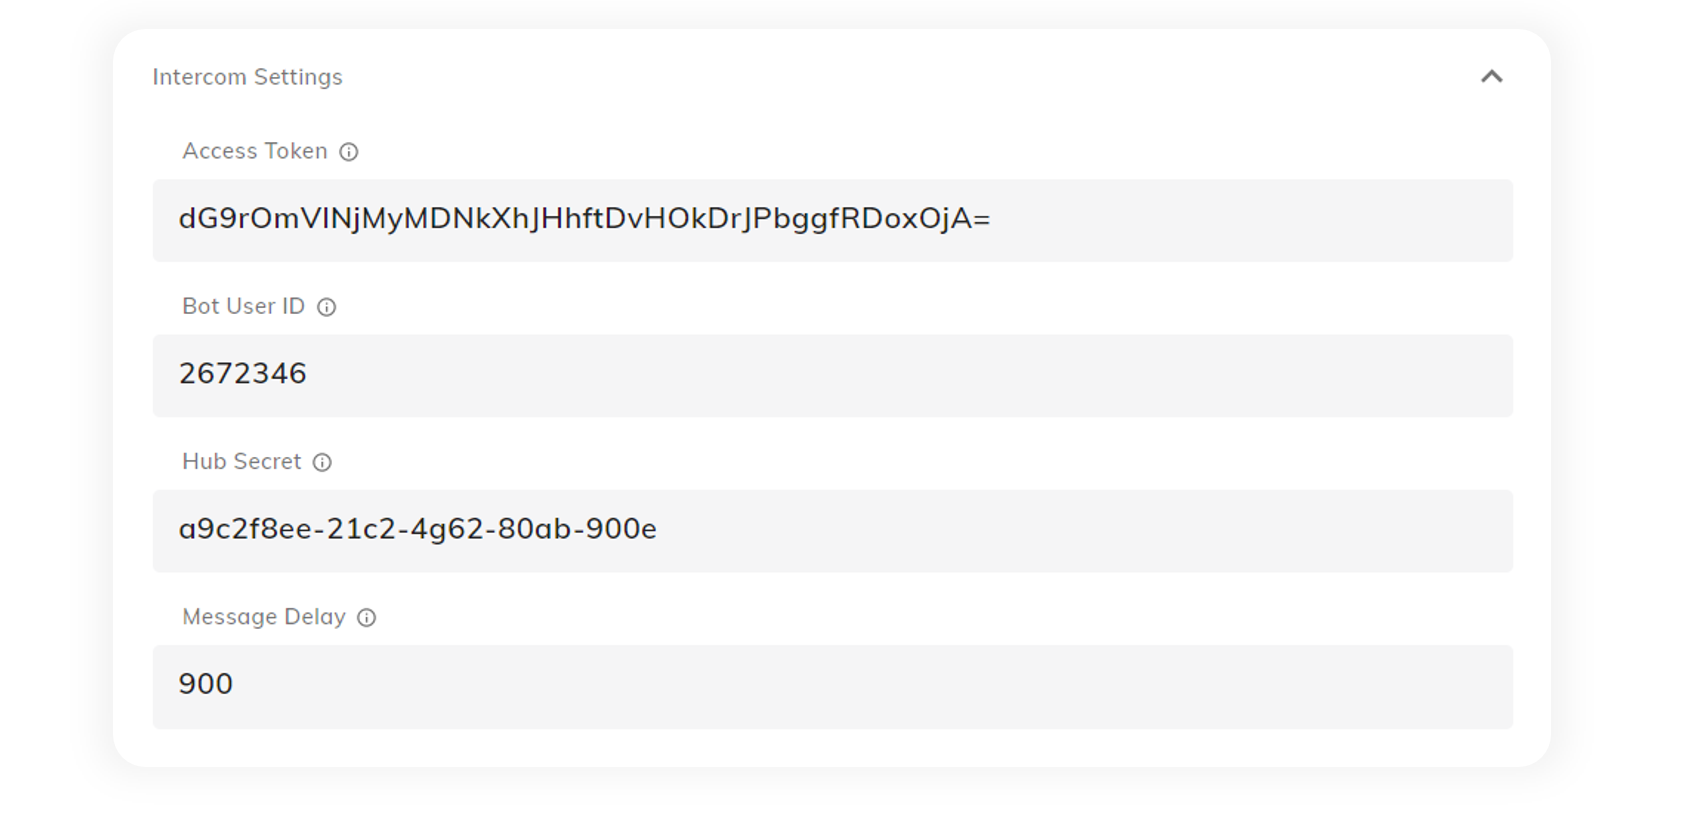 Figure 8: Saving the Access Token in the Cognigy.AI Endpoint Intercom Settings Menu
You are now finished connecting your Intercom Endpoint with your Intercom Platform! Open your Intercom Webclient on your website and send a message - you will now get a reply from your Flow. You can read the next guide for tips and tricks related to managing the bot's response times and more.
Comments
0 comments