
Source: https://www.hubspot.com/
Hubspot in cooperation with Cognigy.AI provides easy contact maintenance through voice or chat channels. This tutorial will explain how to connect an organization's Hubspot instance to a Cognigy.AI virtual agent and create or retrieve contacts.
Table of Contents
- Install the Hubspot Extension
- Create a Hubspot Connection
- Create a Contact in Hubspot
- Retrieve a Contact from Hubspot
Install the Hubspot Extension
The first step is to install the required integration. In this case, a so-called Extension is installed to Cognigy.AI. Thus, navigate to the Extensions Marketplace inside of the Virtual Agent and add the Hubspot Extension by clicking on the Install button. Now follow this installation guide and upload the Extension to Cognigy, where it will be displayed as the following:
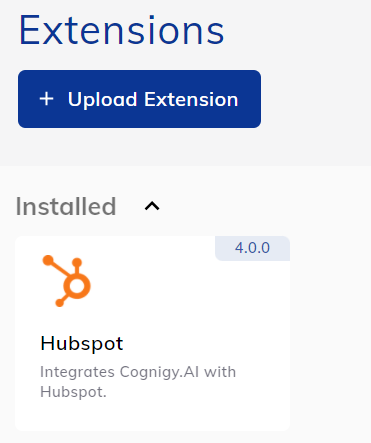
Congrats! The installation of the Extension is finished!
Create a Hubspot Connection
In this step, a so-called Connection will be created. If one, in Cognigy.AI, clicks on the previously uploaded Extension, the following details can be observed:
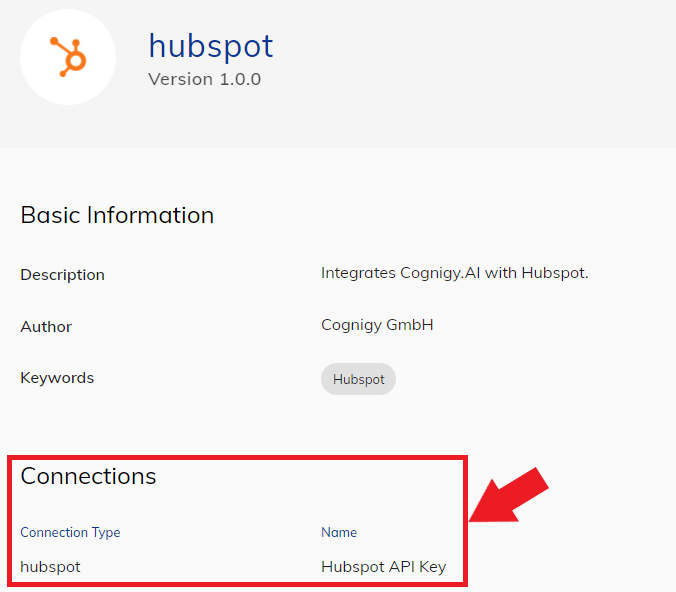
The red-marked part in the above figure shows, that there is a Connection required. Therefore, it needs to be created and filled with Hubspot information. In order to do so, one initial Hubspot Flow Node needs to be added to a Flow:
- Create a new Flow in Cognigy.AI
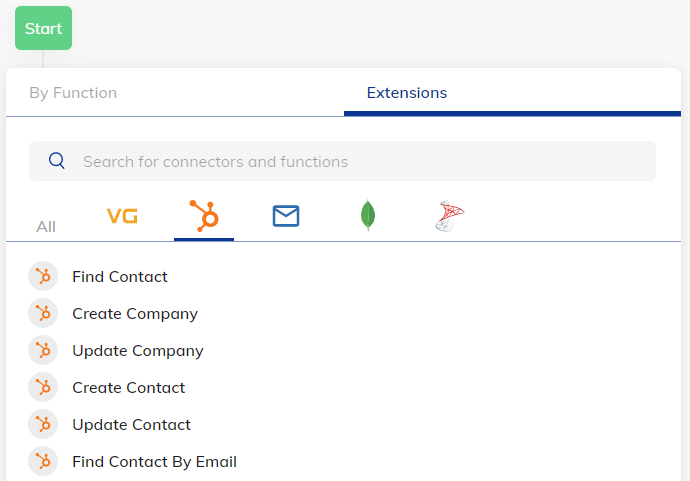
- Inside of the Flow Chart, click on + and navigate to the Hubspot Extension:
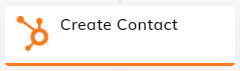
- For example, add the Create Contact Flow Node by clicking on it:
- In order to edit the Flow Node and create the Connection, please click on it. An Edit Node menu will be opened on the right side of the screen:
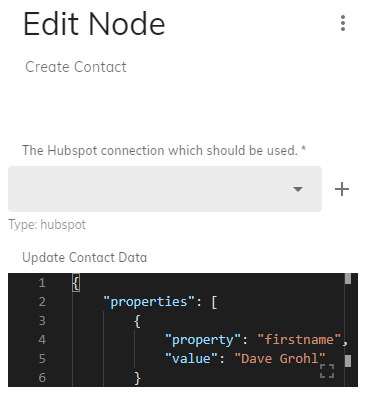
- Right next to the Connection field (the first one at the top), one needs to click on the + button. The Connection menu will be opened at the center of the screen:
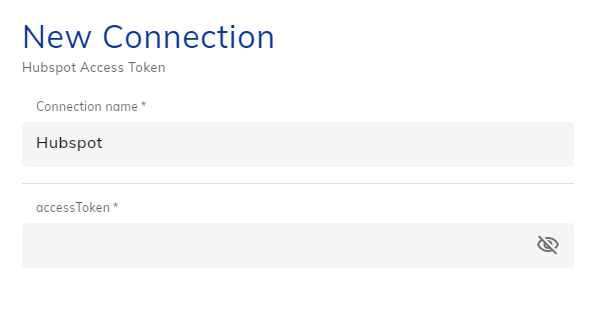

- Insert the related Hubspot API Key.
- accessToken
- Create Access Token in Hubspot
- Important: Only apps with the proper scope will be able to read and make changes via the extension.
- accessToken
- Click on the Create button
Create a Contact in Hubspot
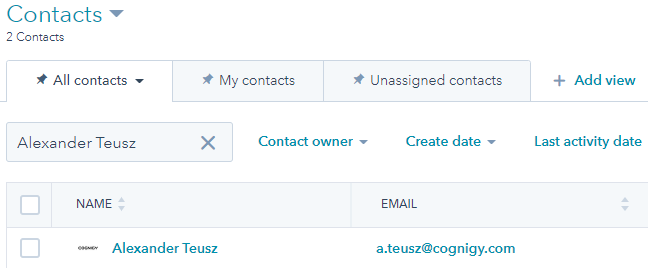
As an example, a new Contact can be created using this Extension within a chat conversation. In the end, the result will be visible in the Contacts table:
The already added Create Contact Flow Node can be used for this, while two Question Nodes can be added as well in order to ask for the first and last name:

What properties should be created in Hubspot, can be defined in the Contact Data JSON Body:
{
    "properties": [
        {
            "property": "firstname",
            "value": "Laura"
        },
        {
            "property": "lastname",
            "value": "Wilson"
        }
    ]
}
One could now use Cognigy Script and extract necessary values from this dynamic data response.
Retrieve a Contact from Hubspot
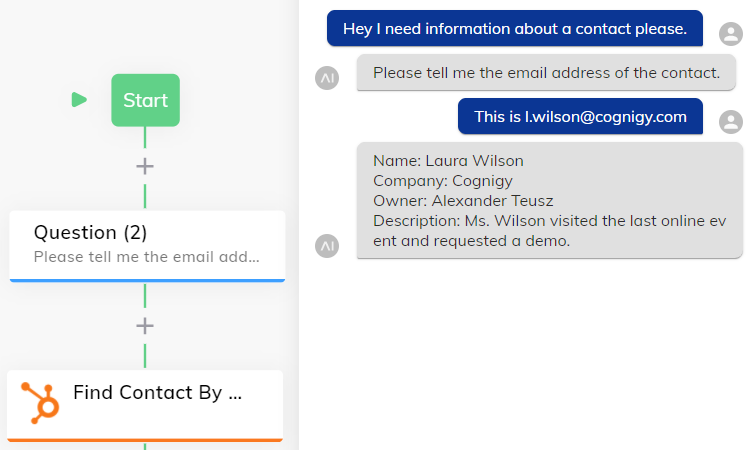
In another situation, retrieving the information about an existing contact could be necessary. In order to do so, the Find Contact or Find Contact By Email Flow Node could be used.
Find Contact By Email
If the email address of the requested contact is known, it can be used in order to directly find the information in Hubspot:
In this case, the email address can be provided manually or dynamically using Cognigy Script: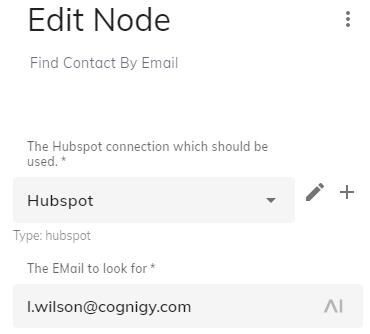
Last but not least, the returned contact can be found in the Input or Context object:
"hubspot": {
    "vid": 123445,
    "canonical-vid": 123445,
    "merged-vids": [],
    "portal-id": 27123836,
    "is-contact": true,
    "profile-token": "AO...",
    "profile-url": "https://app.hubspot.com/contacts/12345/contact/12345",
    "properties": {
      "firstname": {
        "value": "Laura"
      },
      "lastname": {
        "value": "Wilson"
      },
      "...": "..."
    },
  }
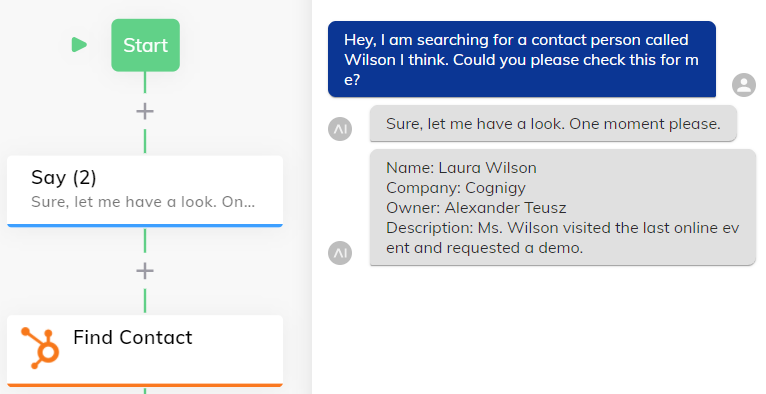
Find Contact
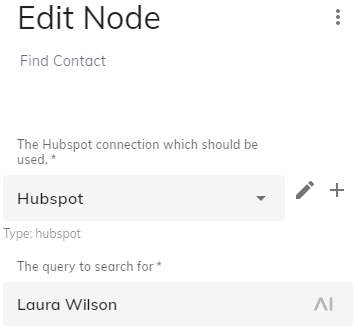
If no information about the contact is available, the Find Contact Flow Node can be used in order to provide a search term that will be used instead of the email address:
Similar to the Find Contact By Email Node, the required information can be provided manually or dynamically by using Cognigy Script in the Edit Menu:
Finally, Hubspot will return the same contact result, such as mentioned above.
Comments
0 comments