All articles on this topic
You can use the Dialogflow NLU Connector to connect to Google Dialogflow ES and use the language understanding results from this service to power the NLU of agents within Cognigy.AI.
Requirements
You'll need the following two credentials to successfully connect to a Dialogflow ES agent from Cognigy.AI:
- Dialogflow Project ID
- Private Key
Setup
This section describes the necessary steps for setting up a basic Dialogflow agent. For more detailed information, refer to the Google Dialogflow Documentation.
1. Create a Dialogflow ES Agent
🔗 In Google Dialogflow
Go to Google Dialogflow and login or create a new account. After logging in and getting redirected to your Dashboard you should be able to create a new agent by clicking on the Create New Agent button available from the dropdown menu in the top left of the screen.
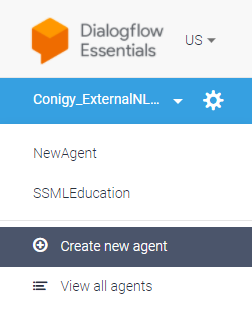
Give your agent a name and select Create.

2. Create an Intent
🔗 In Google Dialogflow
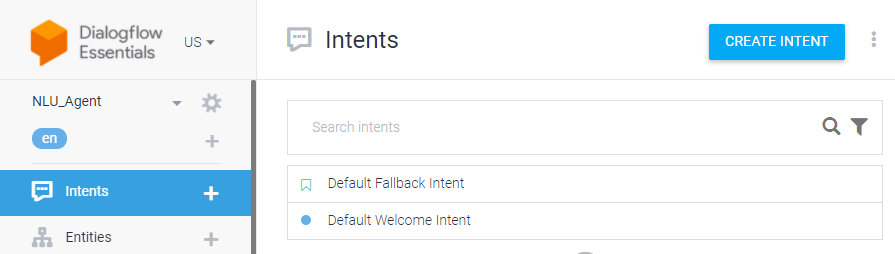
From the left resources menu, select the Intents option. This will open the list of existing intents and you will have the option to add an intent by selecting the Create Intent button.
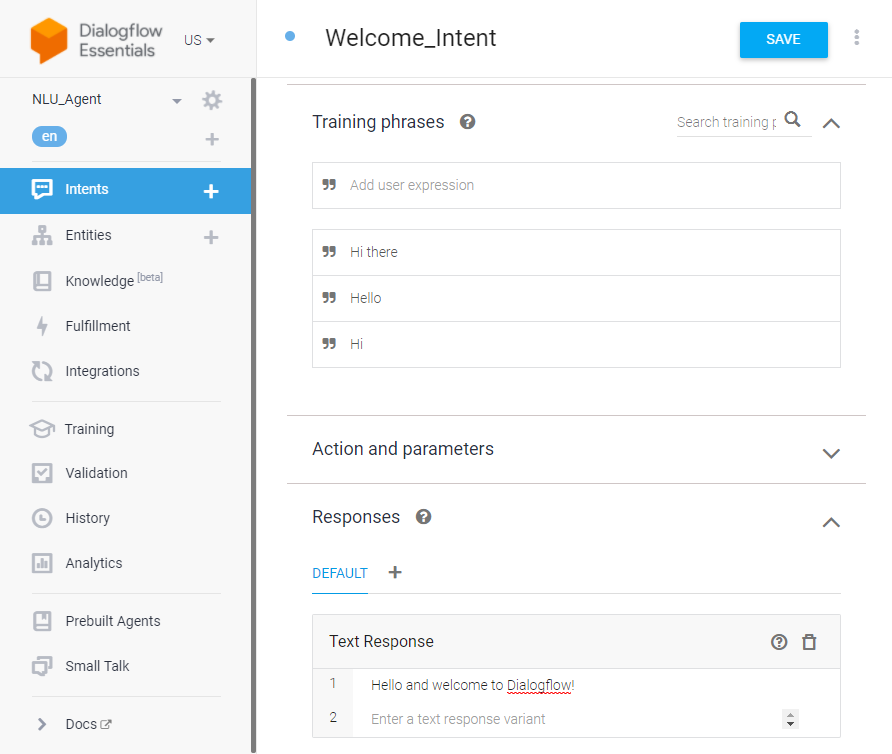
Add a name, training phrases and an optional response to your intent. This is the data that Dialogflow will use to respond to your input messages and will select this intent if it finds a match. Select the Save button to automatically train the Dialogflow NLU.
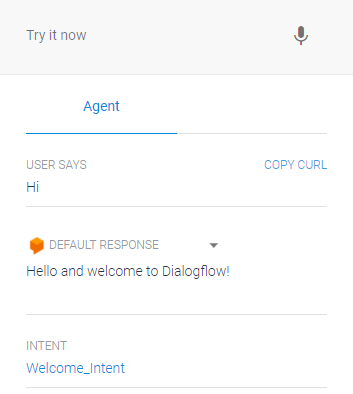
Finally, test your intent and response by typing an example sentence into the "try it now" field in the top right of the screen. If your bot responds correctly, then you have successfully created a basic bot in Dialogflow.
3. Enable the Dialogflow API
🔗 In Google Dialogflow
The next step is to activate the Dialogflow API feature for your agent within Google Cloud so you can access the service remotely from Cognigy.AI.
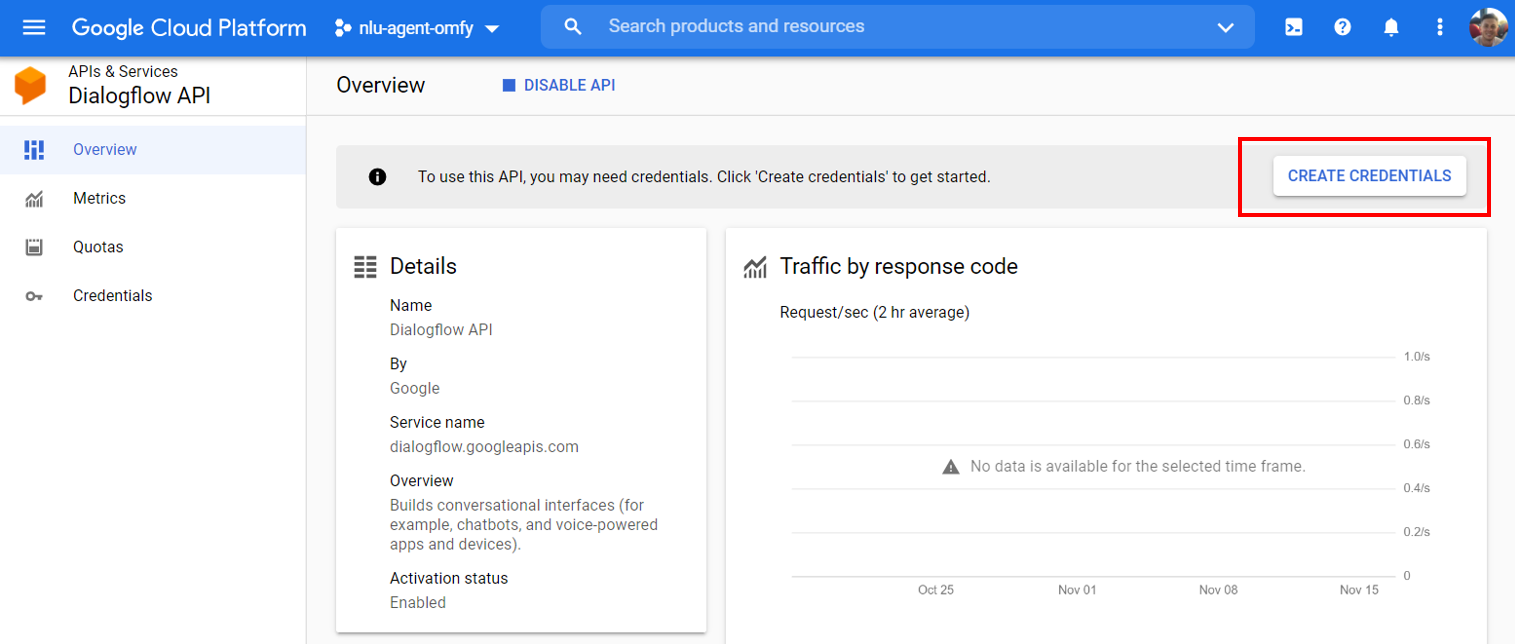
Select the gear icon next to the agent name from the top left of the Dialogflow dashboard to open the agent settings menu. From the general agents settings, note down the project ID value, this will be used to fill the credentials for the NLU connector in Cognigy.AI. Click on the project ID to open google cloud.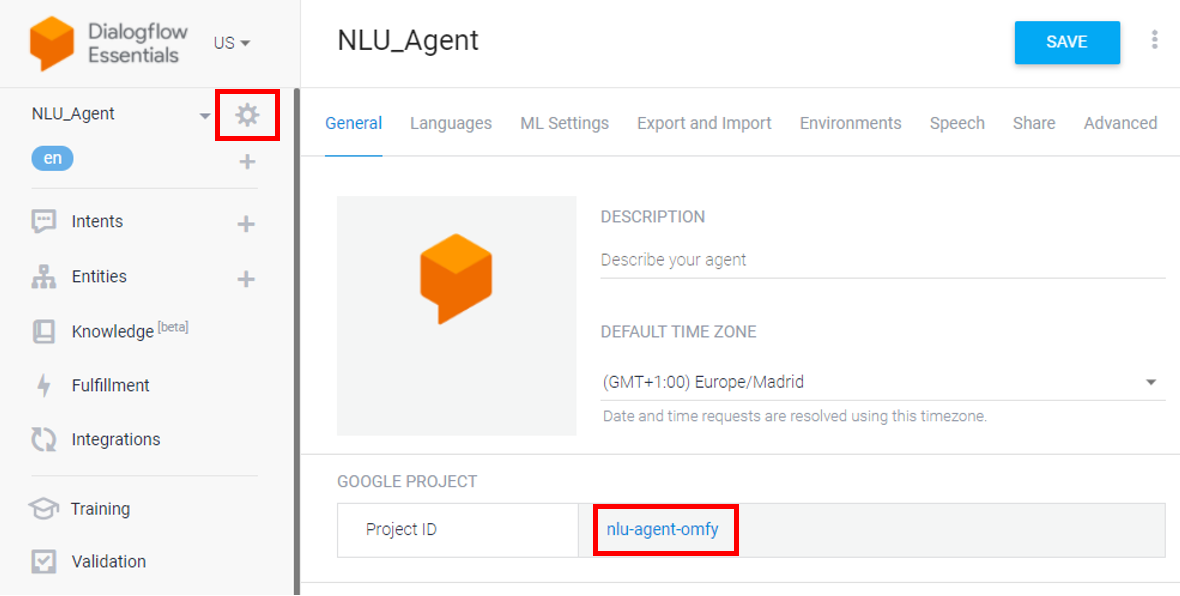
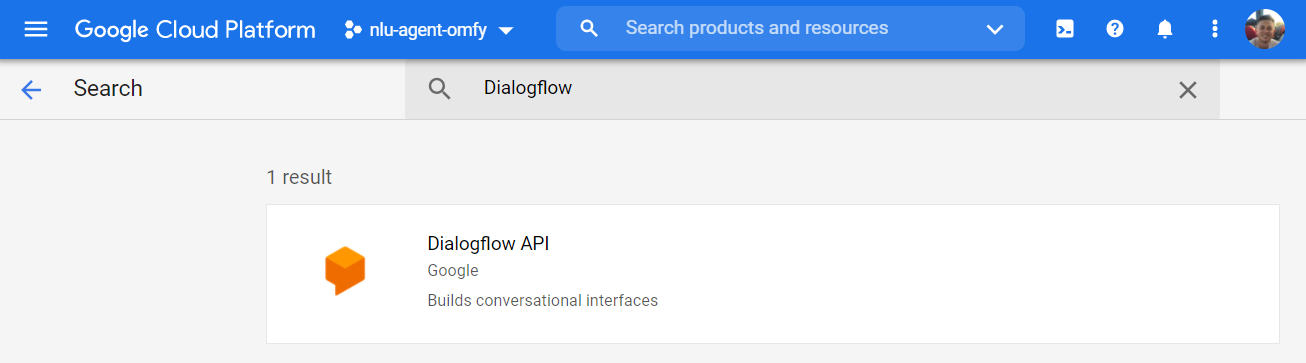
Once in the Google Cloud dashboard, select APIs & Services from the left resources menu. Select + Enable APIs and Services from the top of the display and find the Dialogflow API option.
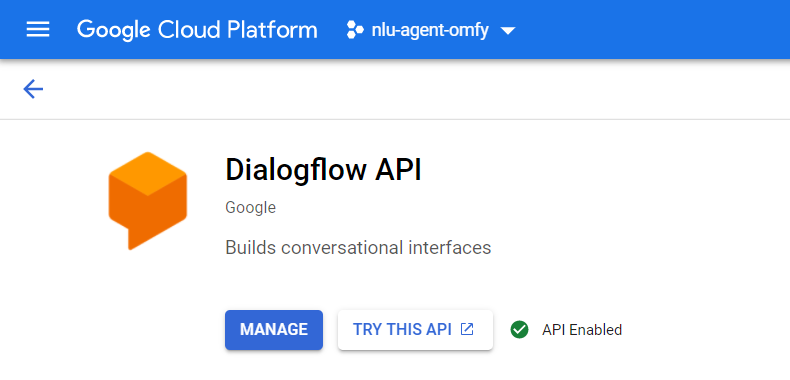
Once the Dialogflow API is activated, select Manage to open the Dialogflow API management dashboard.
4. Create a set of Service Account Credentials
🔗 In Google Cloud Dialogflow API Manager
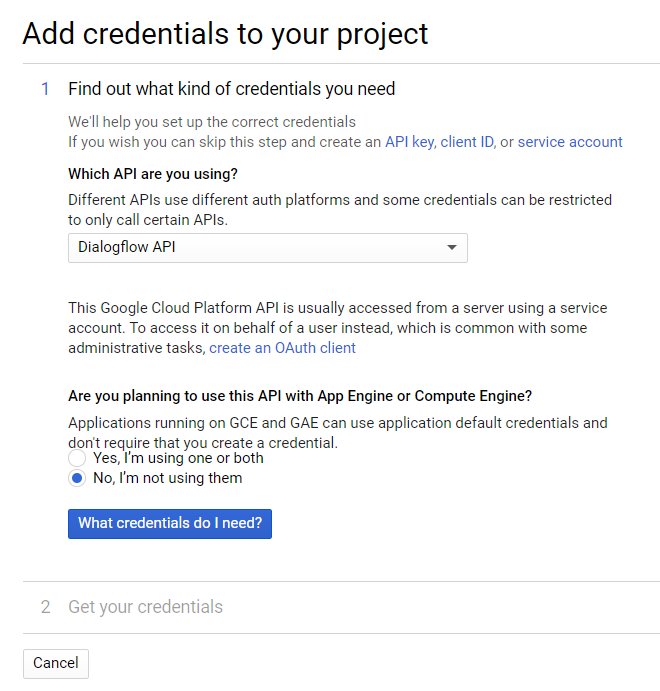
You will now need to create a set of credentials to use the API. Select Create Credentials from the pop-up menu at the top of the screen. (If you already have service accounts with credentials, you can access them from the Credentials option in the resources panel on the left of the interface.)
In the credentials creation menu, select Dialogflow API from the dropdown menu and select No as your answer for the secondary question regarding use of other Google services. Click the "What credentials do I need" button to proceed.
Add a service account name and select a role for the account. The project Owner role will provide the required level of permissions to perform API requests from Cognigy.AI. Finally, select JSON as the key type option and click Continue.

A file will be automatically downloaded containing the JSON Private Key information for use in the NLU Connector settings for Cognigy.AI. The file should have the following layout:
{
"type": "***",
"project_id": "***",
"private_key_id": "***",
"private_key": "***",
"client_email": "***",
"client_id": "***",
"auth_uri": "***",
"token_uri": "***",
"auth_provider_x509_cert_url": "***",
"client_x509_cert_url": "***"
}
Save this JSON payload securely, you will not be able to access it again. The entire contents of this JSON file will need to be copied into private key field inside the Cognigy.AI NLU connector. If the file does not download or you need to generate a new key, this can be done inside the Credentials menu accessible via the Dialogflow API dashboard. You can read more about managing private keys in the Google Cloud Documentation.
5. Create a a Dialogflow NLU Connector
🔗 In Cognigy.AI
The last step is to create and configure a Dialogflow NLU Connector on the Cognigy.AI platform. In Cognigy.AI, navigate to the NLU connectors menu found under the Build sub-menu in the resources panel. Create a new NLU Connector of type Dialogflow.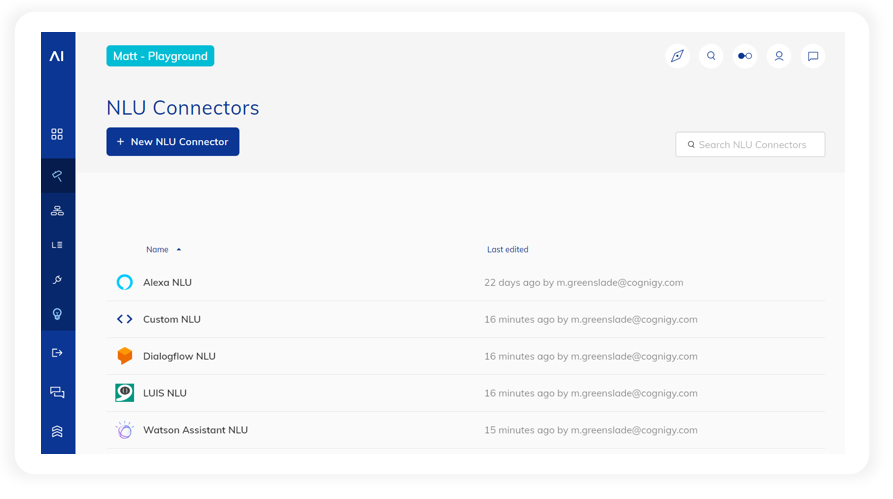
The NLU connector settings will be opened automatically (you can open the settings again by clicking on the NLU connector) where you can find the corresponding fields for the Dialogflow credentials collected in the previous steps. Using the v2 API setting, enter the credentials gathered in the earlier steps to connect to the service. (The Dialogflow Project ID can also be found within the JSON Private Key as the second variable.)
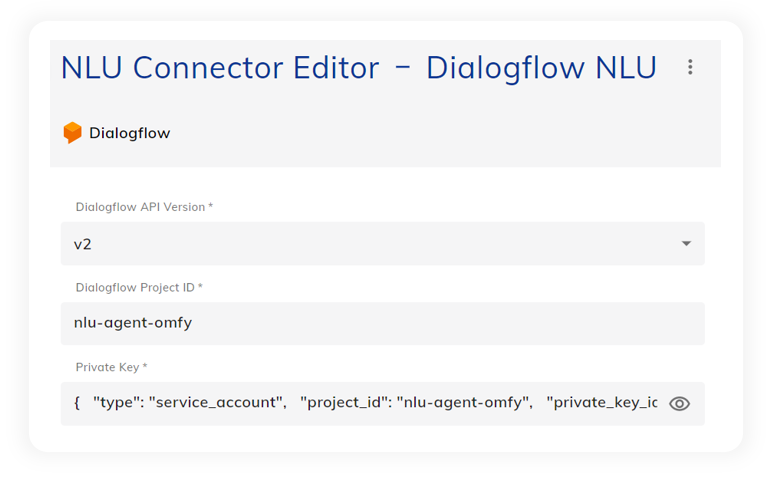
Remember to copy the entire JSON file that was downloaded from Google Cloud into the Private Key field.
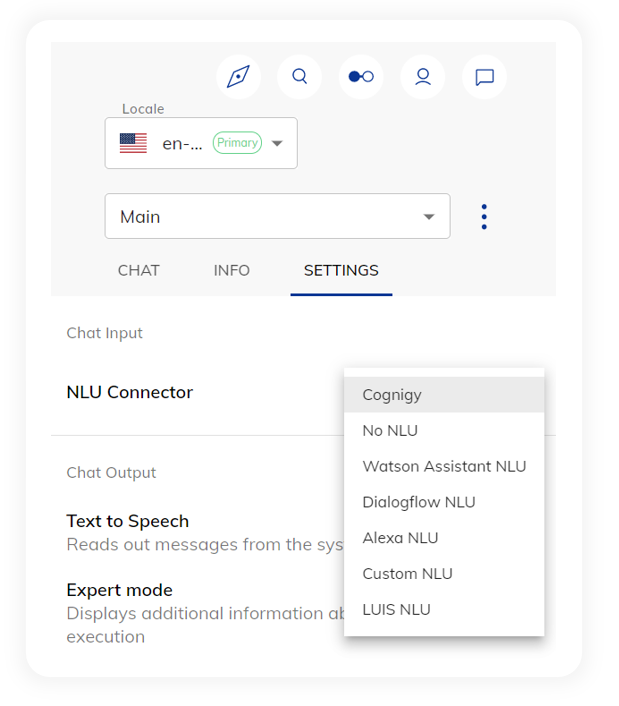
6. Test your NLU Connector
🔗 In Cognigy.AI
Open the interaction panel from the top right of the interface. Select settings, then select the Dialogflow NLU connector you just created from the NLU Connector dropdown menu. Additionally, enable Expert Mode to get a summary of the intent mapping printed to the chat window.
Now select the chat tab and type a message to your bot that was one of the example sentences you used for intent creation in Dialogflow. If the connection is successful, you will see an orange box showing the name of the Dialogflow intent that you configured earlier.
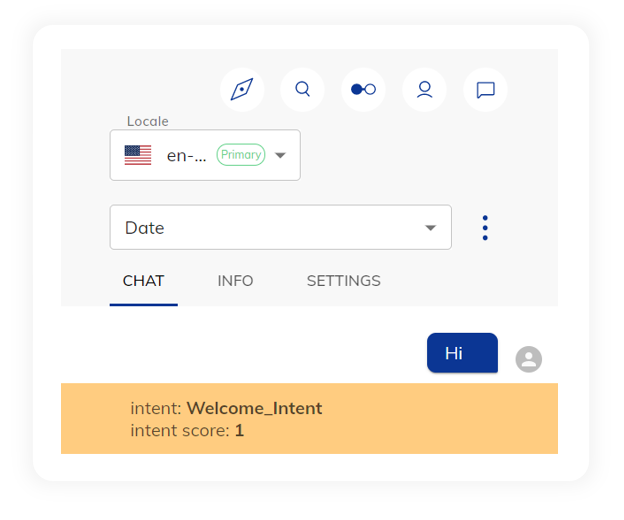
Congratulations, you have successfully connected Dialogflow as the NLU service for Cognigy.AI!
Deploying your External NLU
Once you have activated an NLU connector, it will become available for use with Endpoints and the Interaction Panel. Visit the Cognigy.AI External NLU documentation page to find out how to deploy your external NLU within the platform.
Comments
0 comments